In this Photoshop tutorial, Ellie talks you through how to create a realistic reflection effect on text using Photoshop.
If you’d prefer written instructions, then just keep reading.
1. Adding Text
The first thing you want to do is to add your text to the canvas. Click on the ‘Text’ tool on the left-hand-side of the screen and click anywhere on your canvas to create a layer. Change the font, colour, and style of your text to your liking, and start typing in the word/words of your choice. You now have your text.

2. Resizing the Text
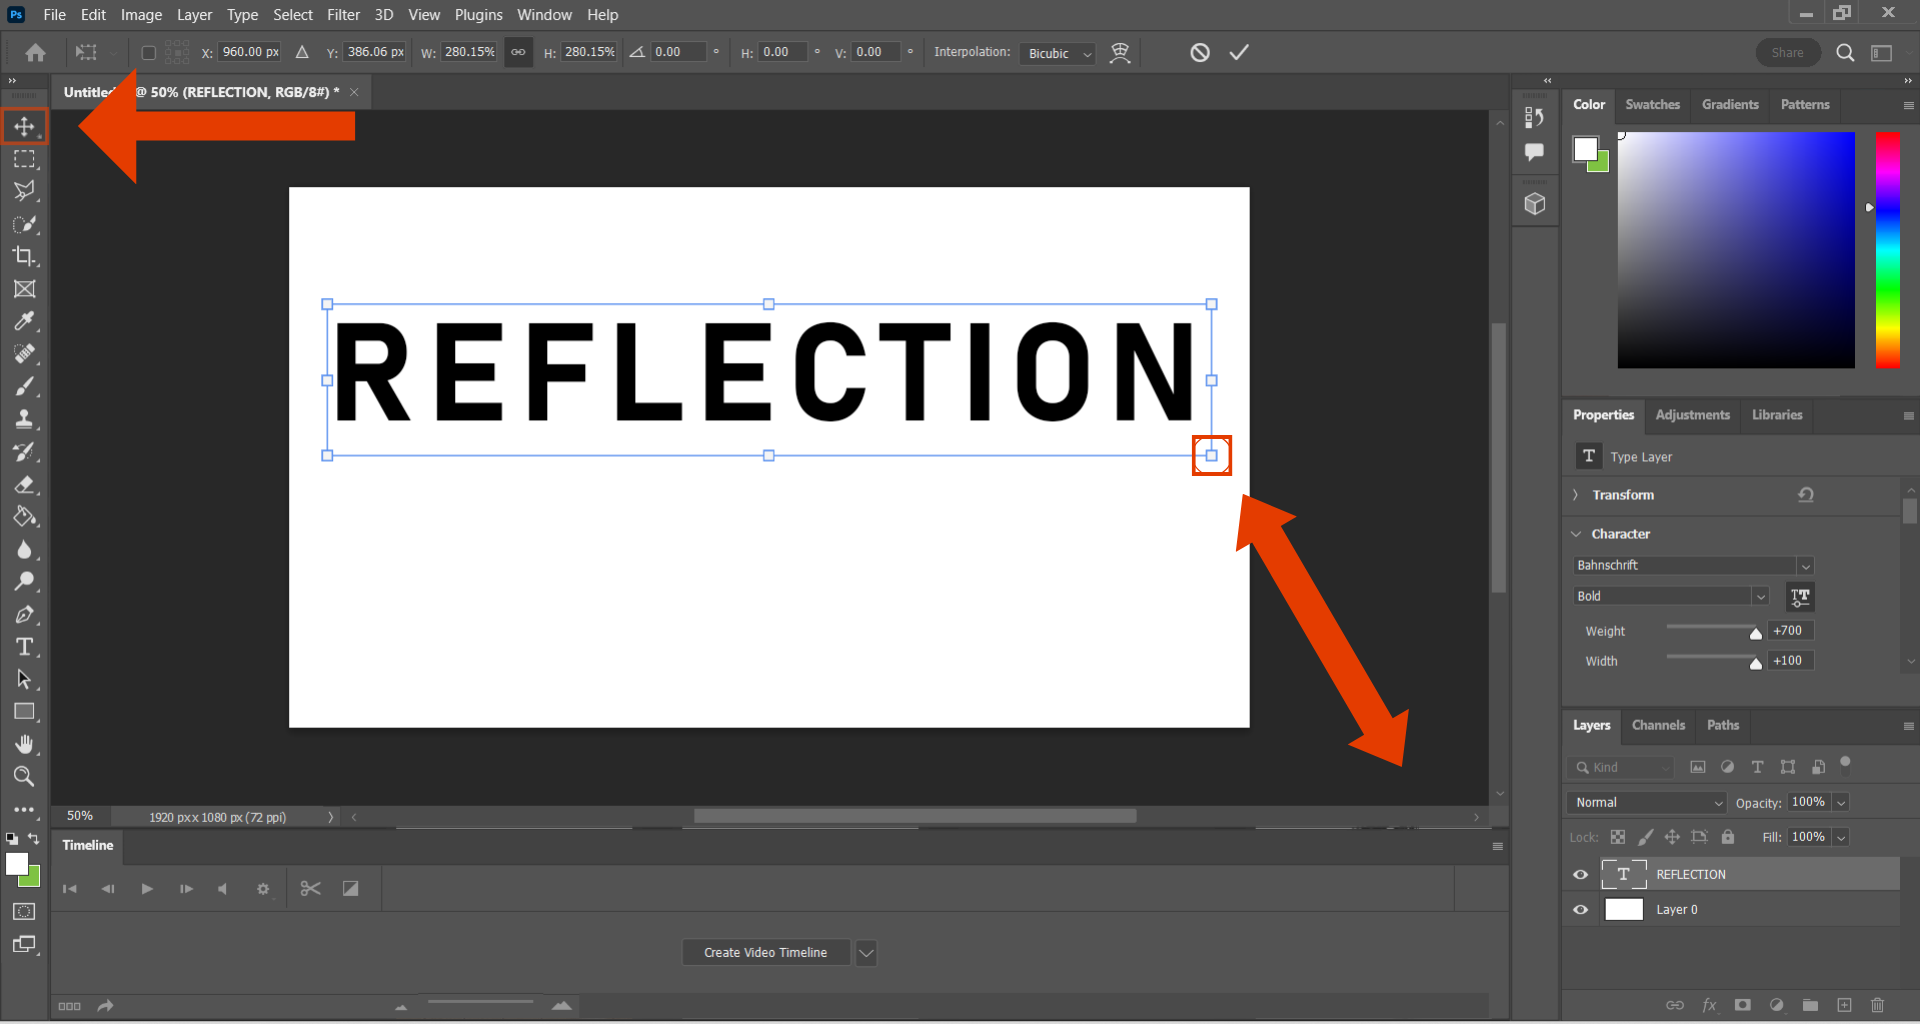
Make sure you have selected your layer of text and click on the ‘Move’ tool. After that, drag the corners surrounding the text to the size you would like it. For this tutorial I have made my text quite large to fill the canvas so that it’s easier to see, however this isn’t necessary and your word/words can be any size you want.
3. Duplicating the ‘Text’ Layer
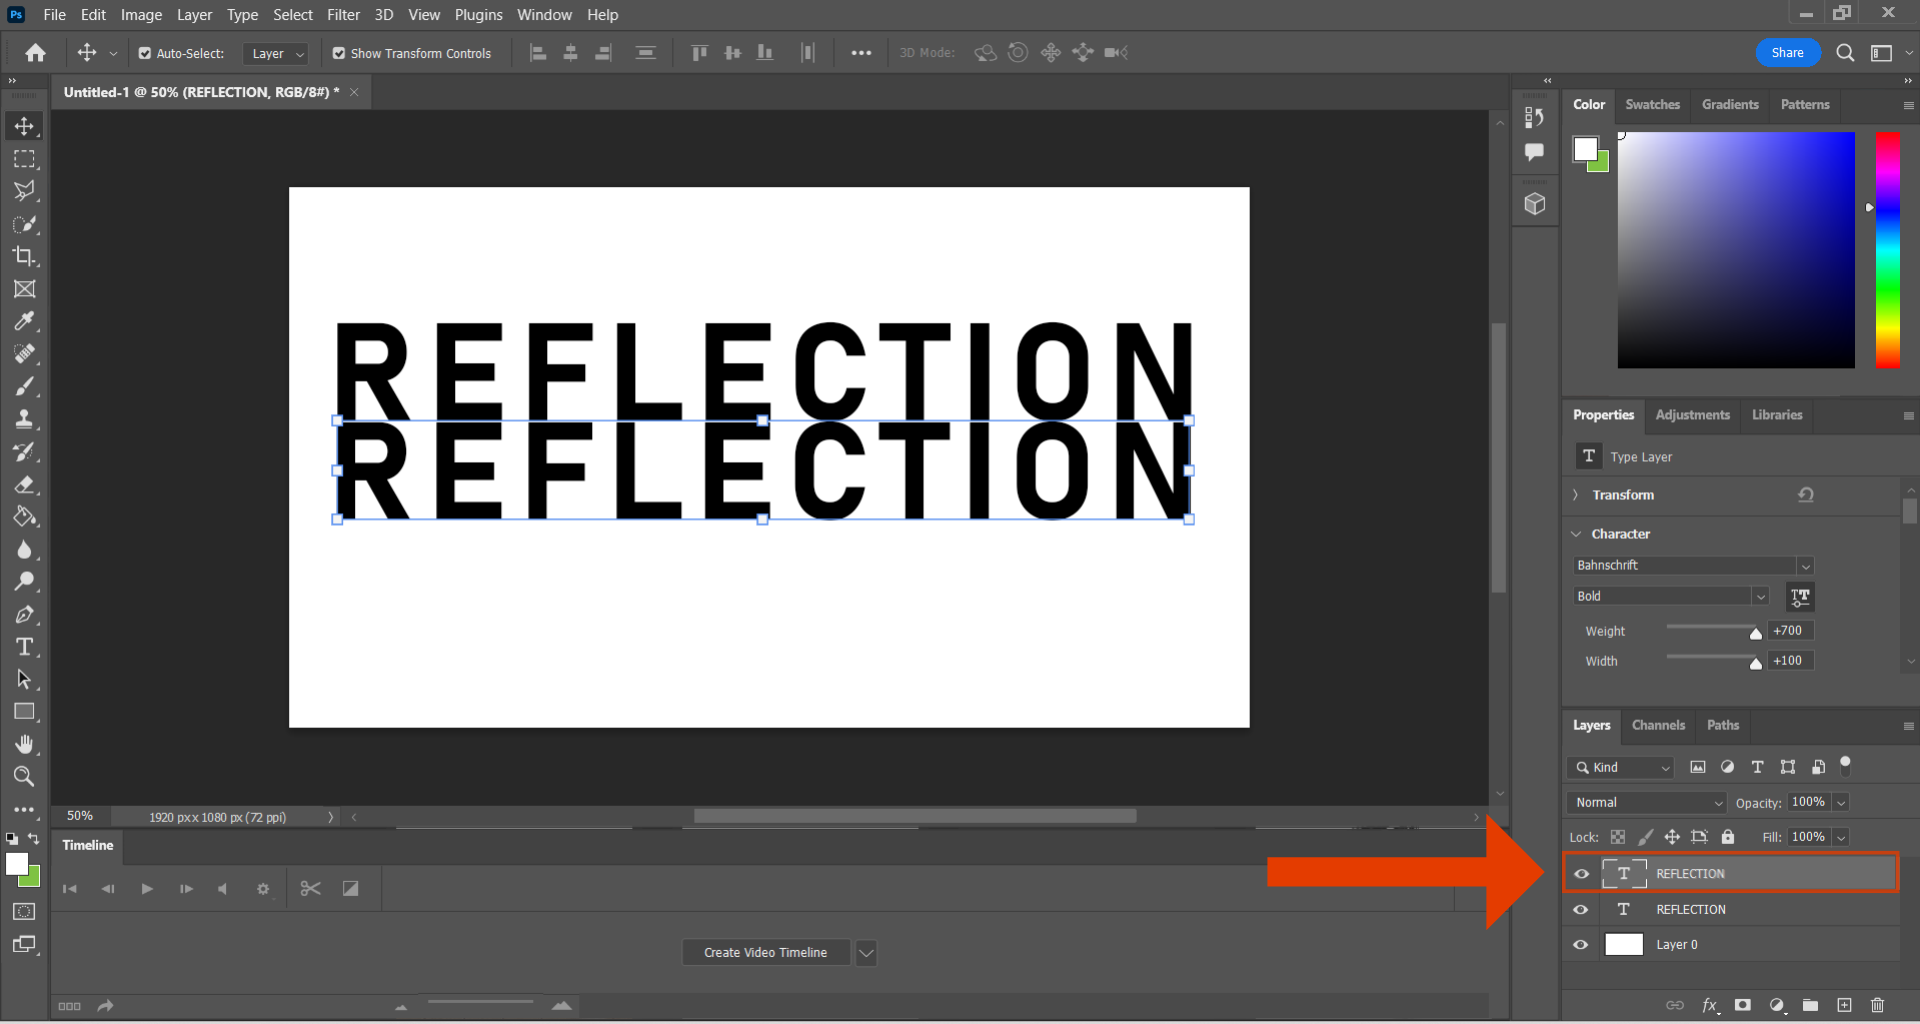
Once you are happy with the look and size of your text, you will need to duplicate it. To do this head over the ‘Layers’ panel at the bottom right-hand-side of the screen and select the layer with your text. After that, press ‘Ctrl C’ to copy this layer and click ‘Ctrl V’ to paste it into the panel. This has duplicated your layer. Alternatively, you can right-click on the text layer and press on the ‘Duplicate Layer’ option to duplicate the text. Both ways achieve the same goal so do whatever you find easiest.
4. Flipping the Text Vertically
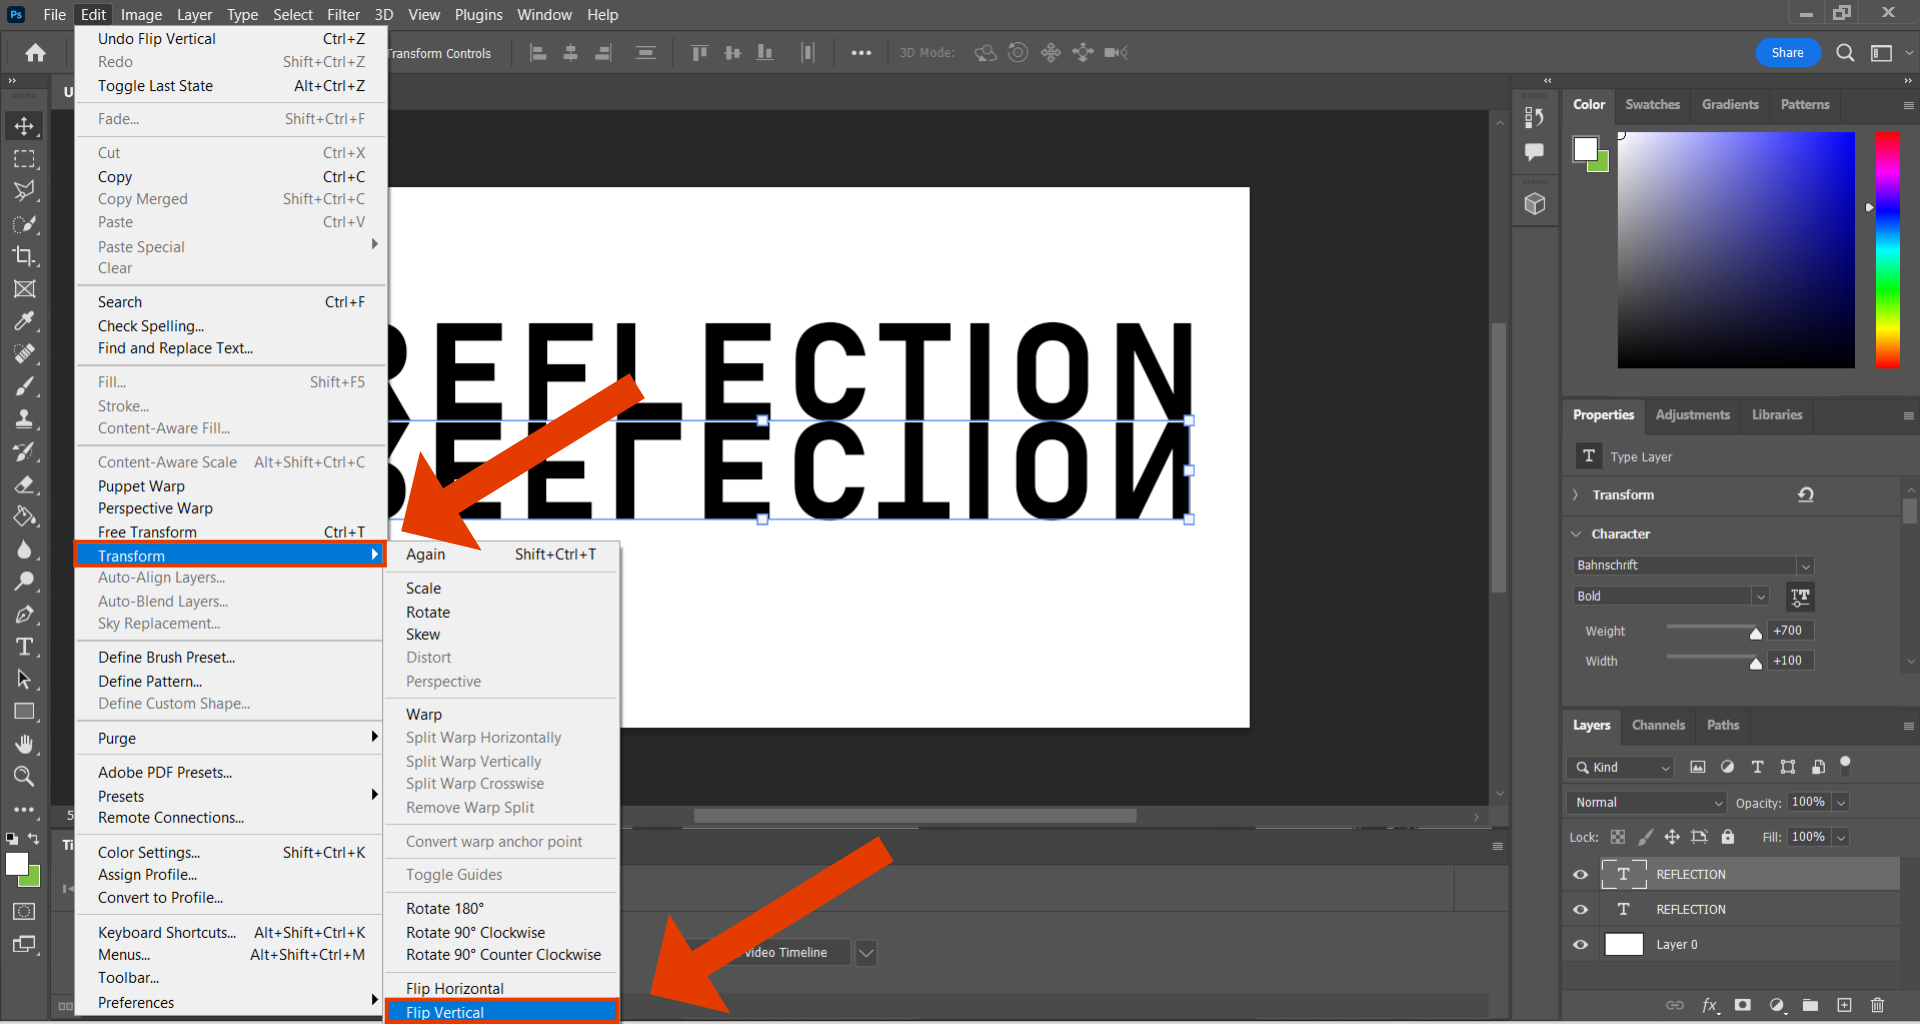
The next step is to flip your text upside down to give it that reflection effect. To do this you need to make sure you have selected the duplicated text layer, and then click on the ‘Edit’ button at the top left-hand-side of the screen. Then press the ‘Transform’ option and click on ‘Flip Vertical’ to flip it. Now that you have your reflected text, you need to drag it underneath your original word/words and line it up to make it look as realistic and accurate as possible.
5. Changing the Text Opacity
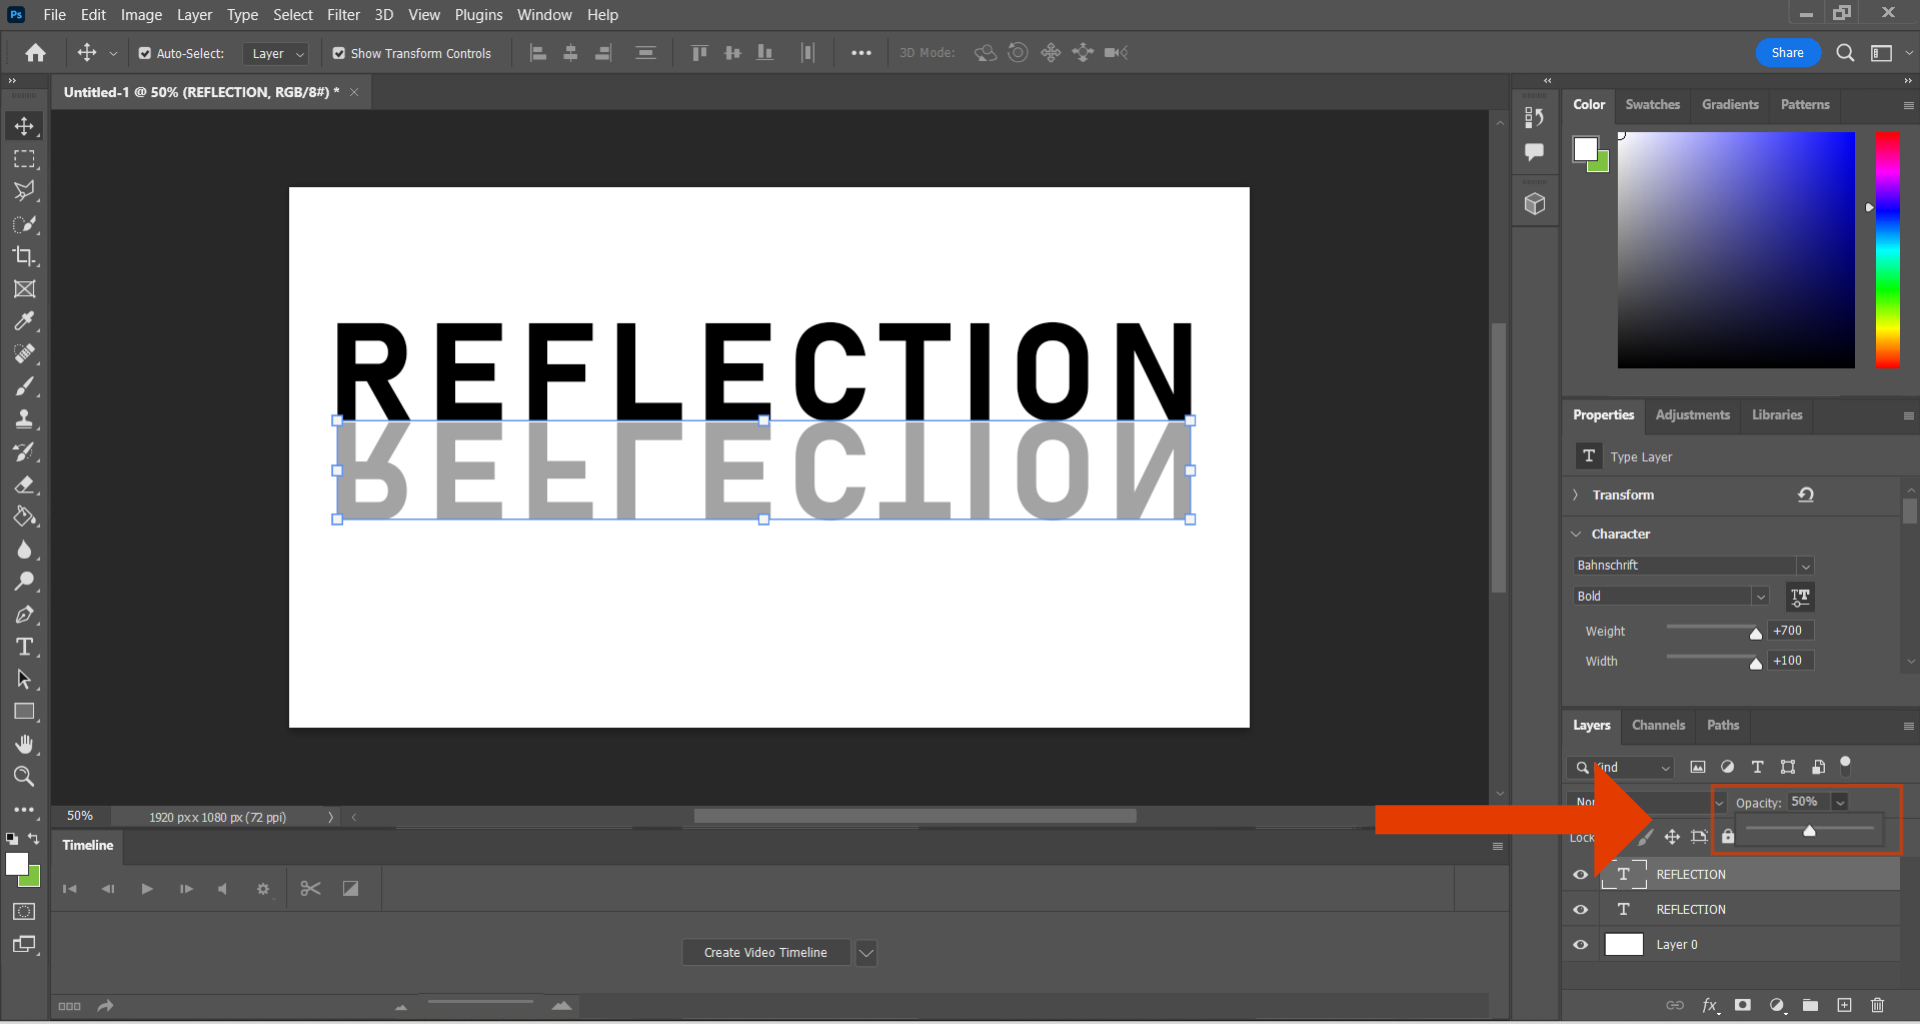
Once you are satisfied with the progress you have made so far, select your duplicate text layer and head over to the ‘Opacity’ option on the bottom right-hand-side of the screen. Adjust the transparency of the layer to around 50% by dragging the slider left and right and you will see the text becoming more faint in colour, which is what we need to create the reflection effect.
6. Adjusting the Brush Hardness, Size, and Colour
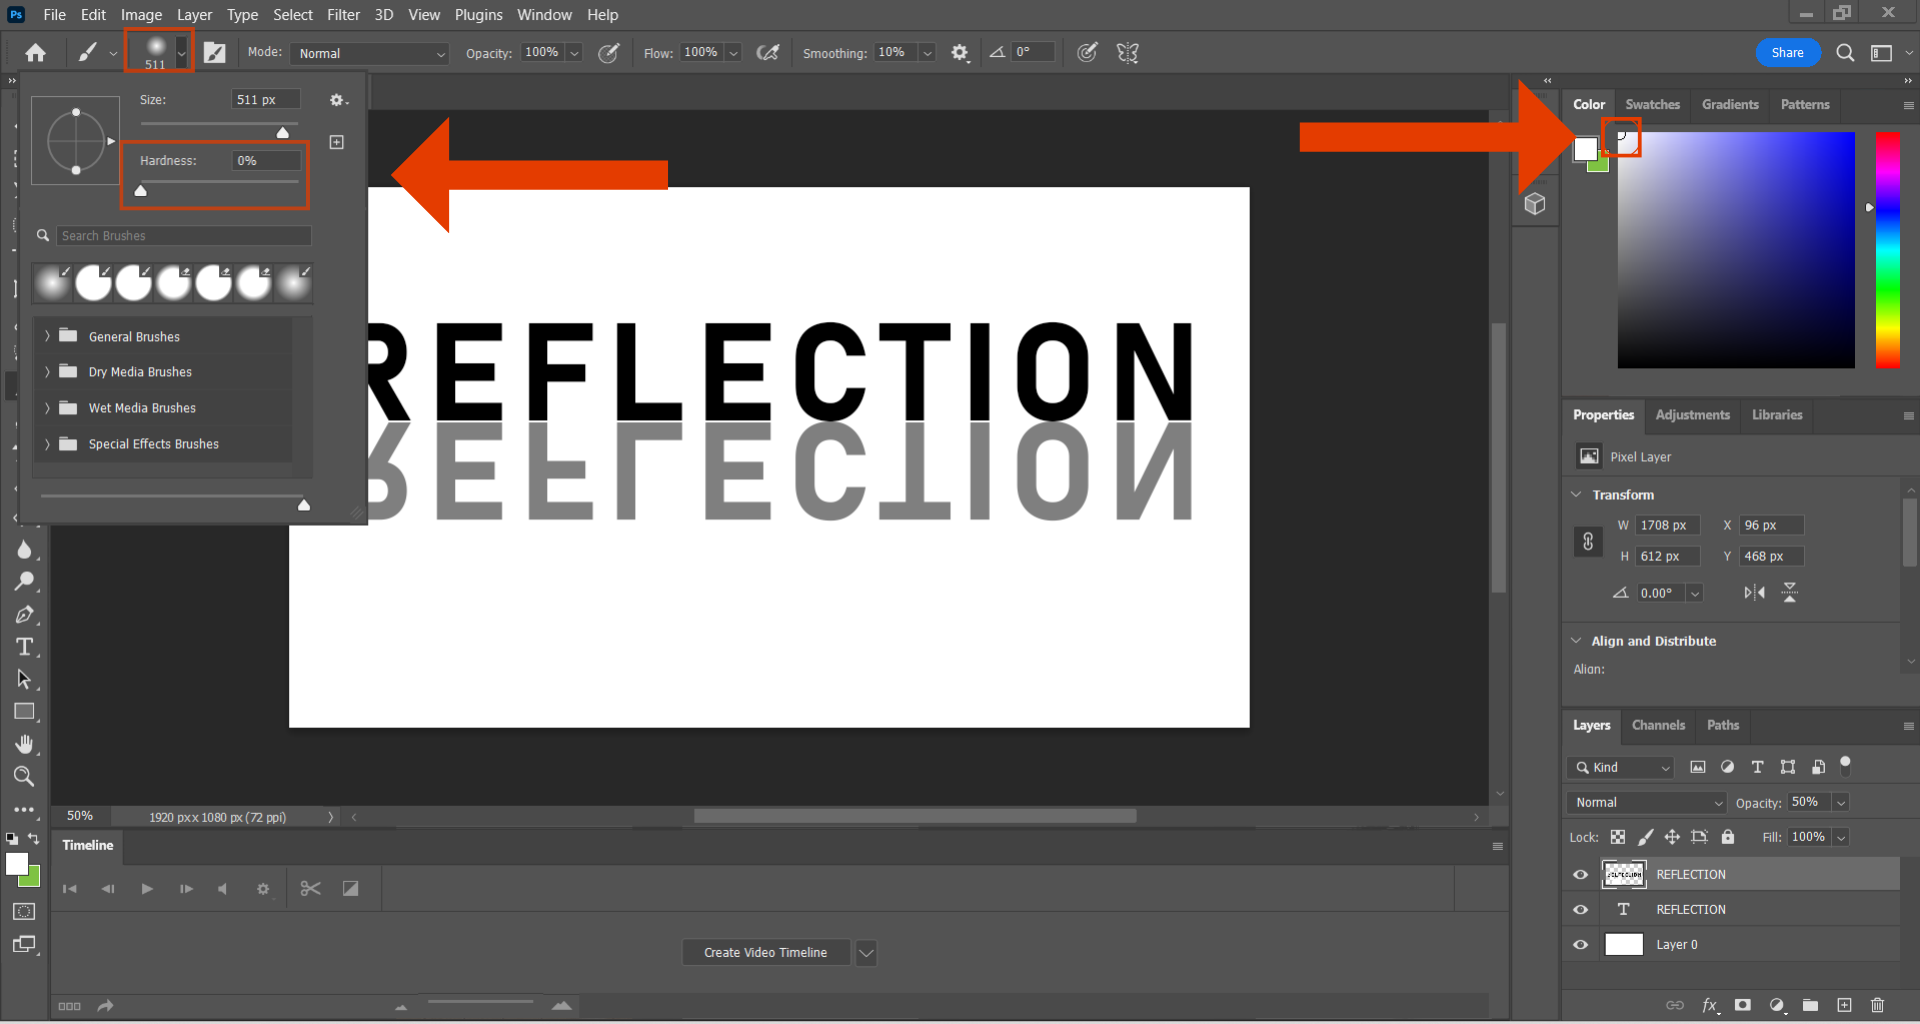
Select the brush tool on the left-hand-side of the screen and head over to the size and hardness option at the top of the screen. After that, adjust the hardness of the brush to 0% by dragging the slider all the way to the left and this will give your word that faded effect. Then adjust the brush to an appropriate size compared to the word, and make sure the colour you have selected for your brush matches the colour of your background.
7. Erasing the Bottom of the Text
Once you are happy with the settings on your brush, start carefully dragging it across the bottom of the reflected text back and forth until you have erased enough of it to give it the reflection effect you are aiming for. You now have your finished result.

8. Saving Your Image
Once you've completely finished it's important to make sure you save your image. Click on the file button on the top left of the screen and press the ‘Save As’ button. Choose a format that suits your needs – JPEG for online use, PNG for transparent backgrounds, or even consider saving it as a Photoshop document (PSD) to retain all your layers for future editing.